Setup
Prerequisites
The terminal commands used assume Mac or Linux, if you are on a Windows machine, you may want to use WSL.
Make sure you have the Supabase CLI installed. To check, run supabase --version in your terminal.
If you haven’t installed the Supabase CLI, you can do so with the following command npm install supabase -g. If you’re not familiar with the Supabase CLI, you can check the Supabase docs.
Clone the repo and install
- Clone this repo.
git clone https://github.com/mrkshm/rnlaunchpad.git - Move into the new folder.
cd rnlaunchpad - Install the dependencies.
npm install - Rename
example.envto.env. - In this .env file, set
IOS_BUNDLE_IDENTIFIERandANDROID_PACKAGE_NAMEto your desired values.
Set up SupaBase
- Set up a new Supabase project.
- Find your Supabase Project URL (in the Supabase Dashboard home page under Project API) and enter it in the .env file (“EXPO_PUBLIC_SUPABASE_URL”).
- Find your Supabase API Key (same place as the Project URL) and enter it in the .env file (“EXPO_PUBLIC_SUPABASE_ANON_KEY”).
- In Supabase, under the Storage tab, create a bucket.
- Enter the name of your newly created Storage bucket in the .env file (“EXPO_PUBLIC_SUPABASE_USER_BUCKET”).
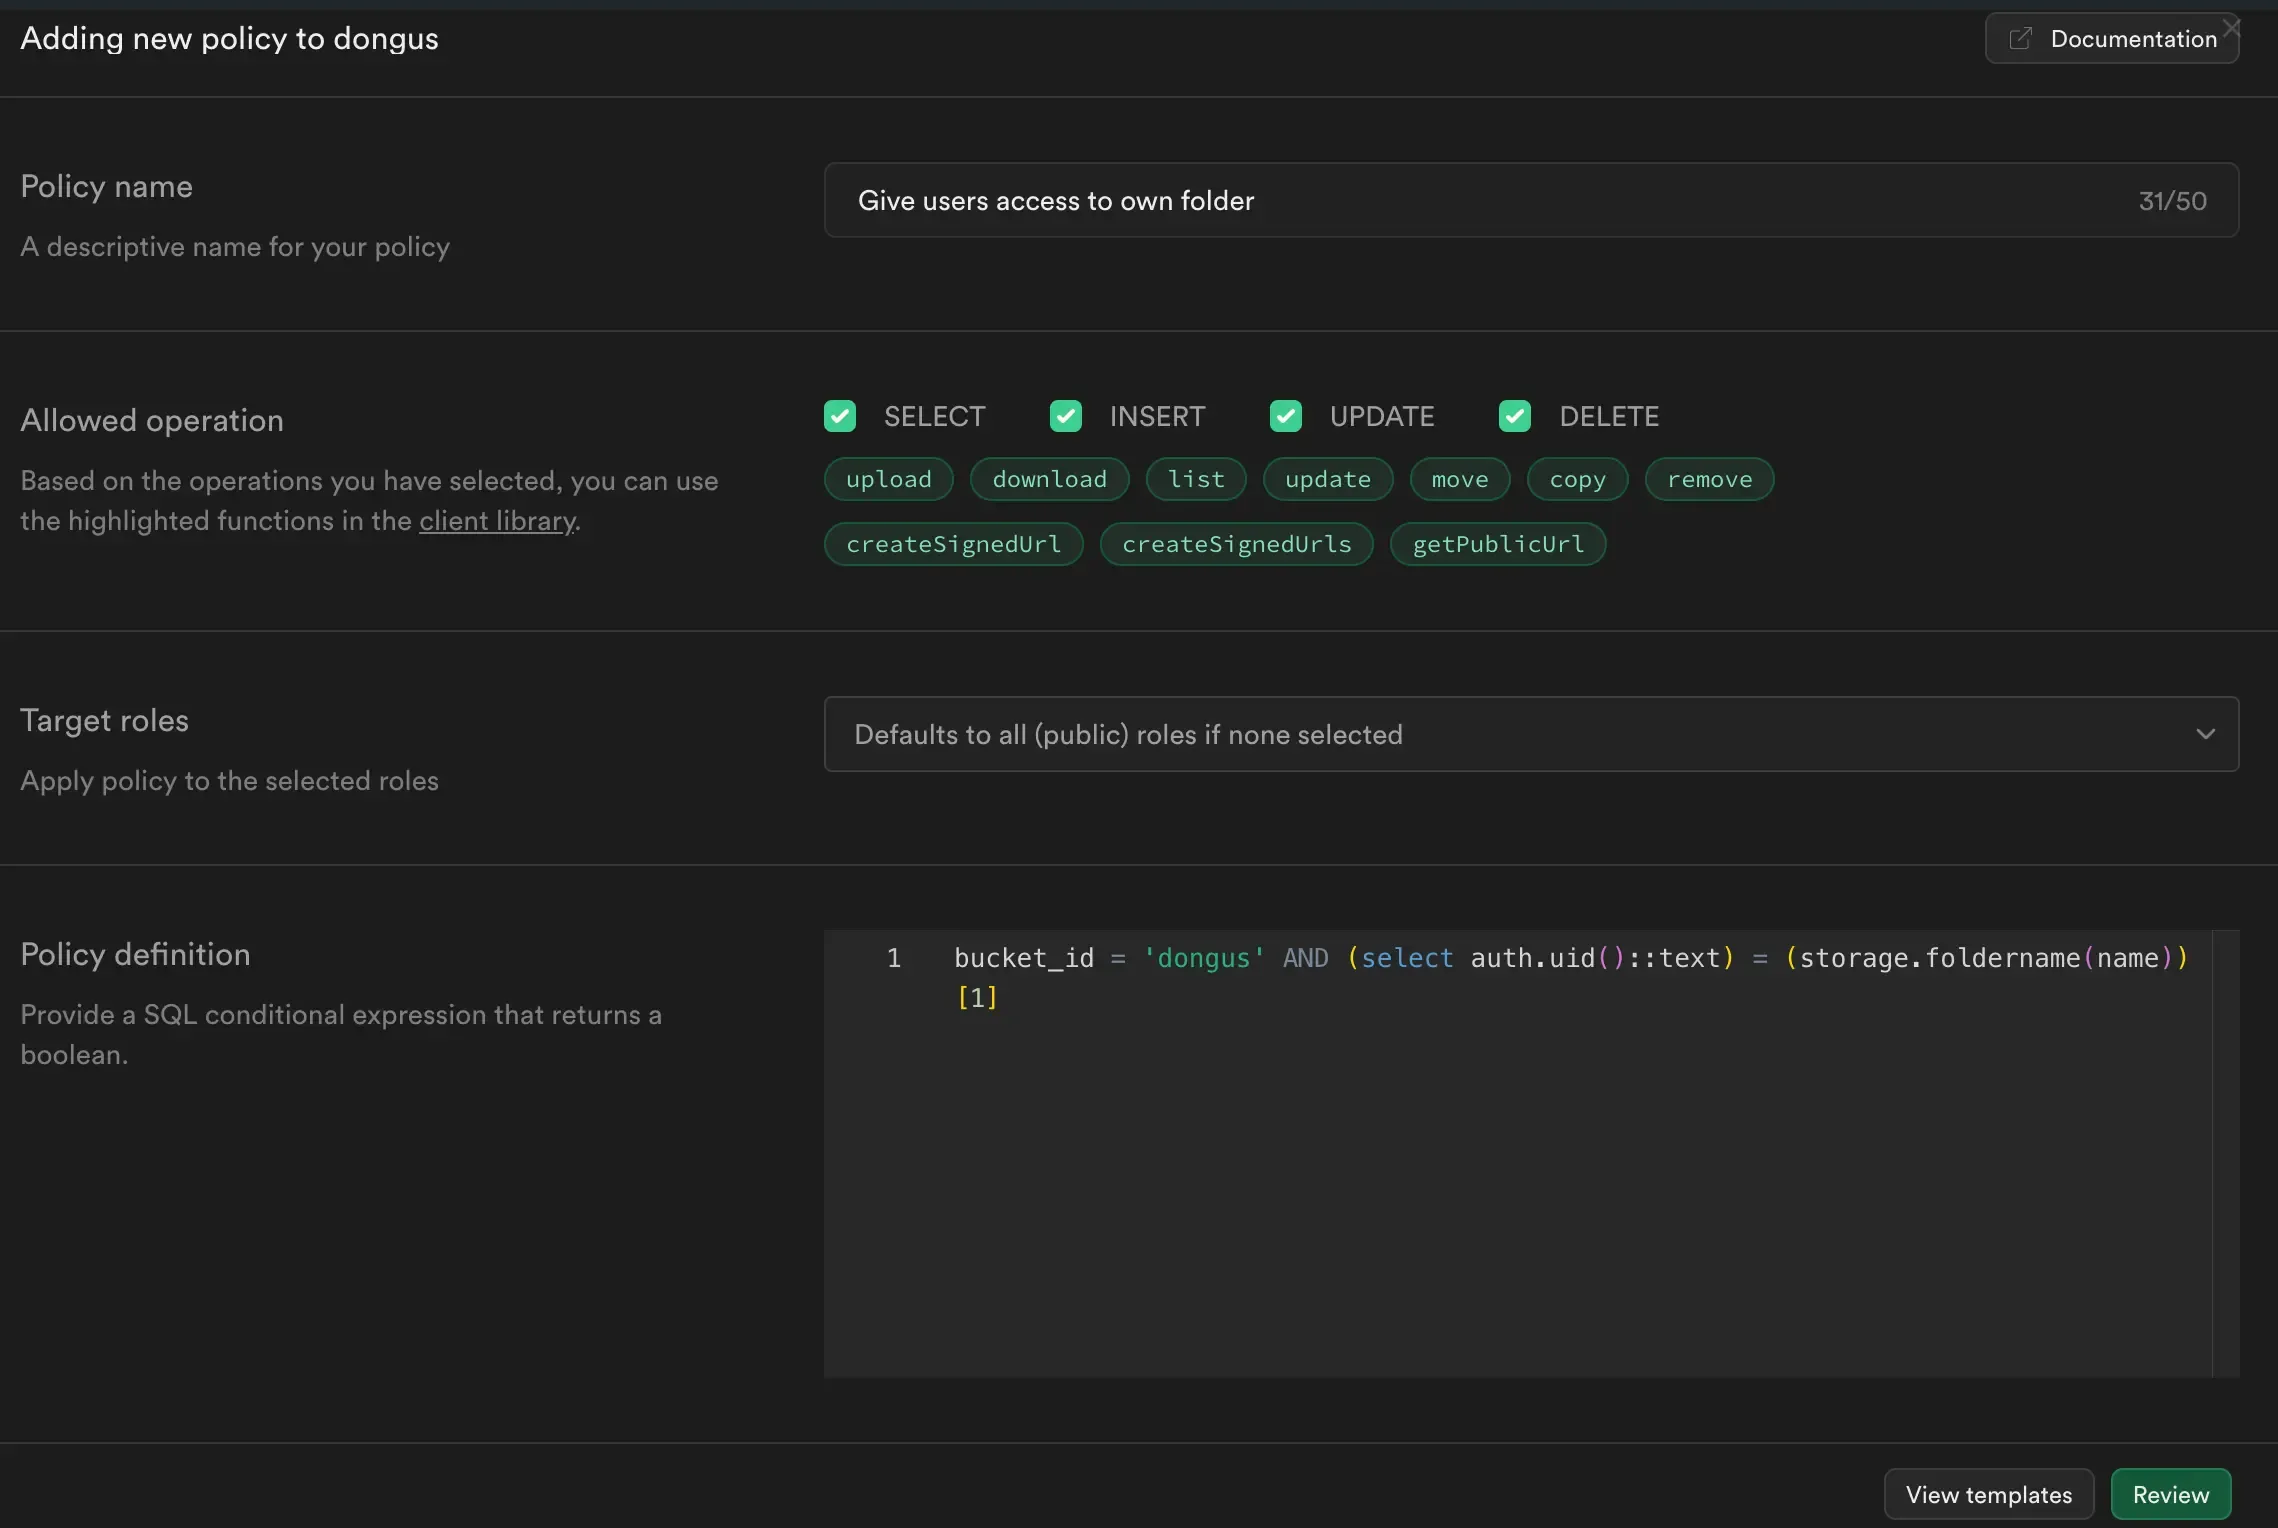
- Create a policy for your storage bucket.
- Choose “Get Started Quickly”.
- Choose “Give users access to only their own top level folder named as uid”.
- Allow all operations (DELETE, UPDATE, INSERT, SELECT).
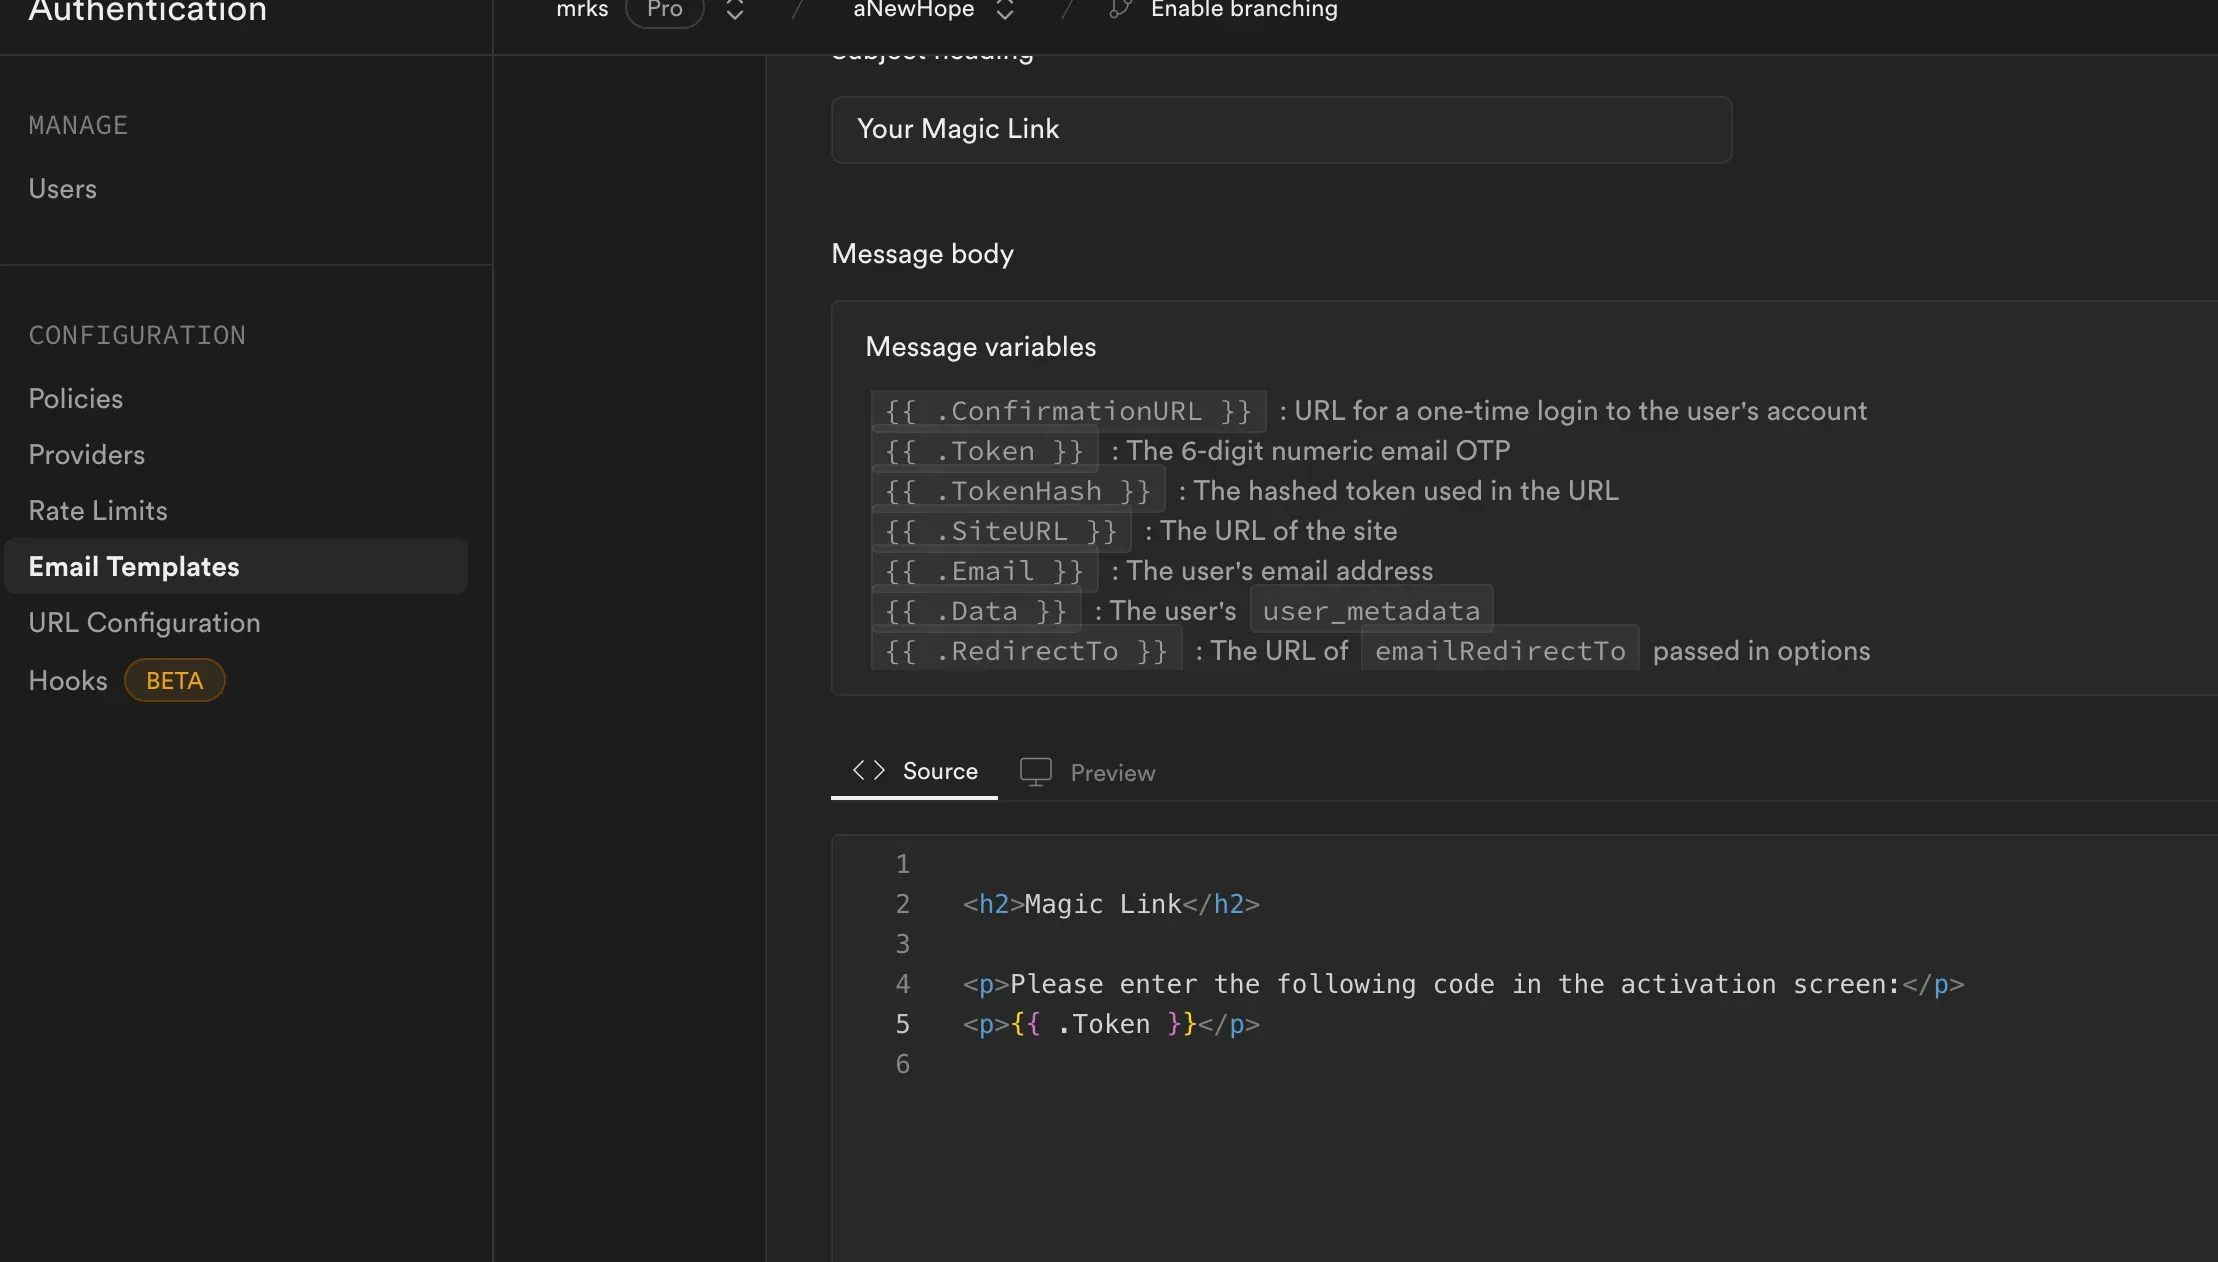
- In the Authentication tab under Email Templates, change the email templates for “Confirm signup”, “Magic Link”, “Change Email Address” and “Reset Password” to something like:
<p>Please enter the following code in the activation screen<p>
<p>{{ .Token }}</p>.
- In Supabase, navigate to Authentication -> Providers -> Email and deselect Secure Email Change.
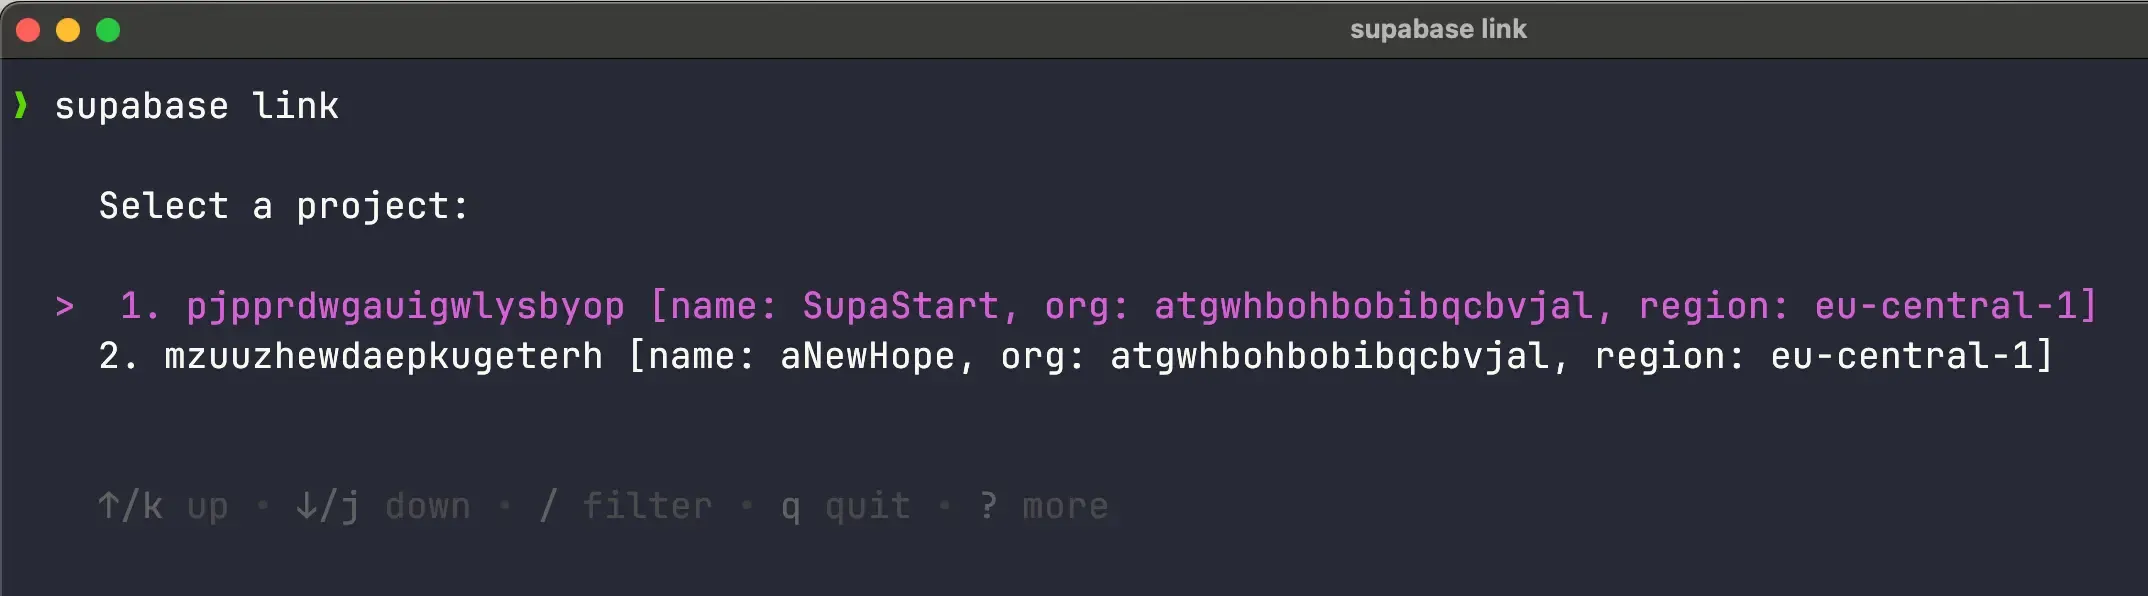
- Link your local project with the Supabase project.
supabase link, then choose the project you just created.
- Before pushing the migrations, you may want to add fields to
public.user_profiles. You can do so in/supabase/migrations/20240527074130_initial_migration.sql. - Push the migrations (
supabase db push). When asked if you want to push the migrations, confirm by pressingY.